While I was in Alabama over the winter, one of the ladies in the RV park showed us her Grandmother's Flower Garden quilt. It was wonderful! She explained that the pattern had been published back in the 70's in Better Homes and Gardens magazine. She showed us how it was made which is really relatively easy. So I've started making a GFG quilt for myself, and as I've gone through the basic steps I've taken pictures. I'm going to attempt to write this as a tutorial for anyone else who would like to make one.

The original instructions directed us to make cardboard templates for hexagons with 2" sides, but I purchased a set of hexagon rulers developed by Marti Mitchell. They are the Quilt Sense Cut Shapes Hexagons.
The package came with 3 sizes of hexagons - 1", 2", and 3". I'm using the 2" for my GFG quilt.
I cut 4" strips from my fabrics and 3.75" strips from my batting. I cut the batting a slight bit smaller than the fabric, so that there would be a bit less bulk in the seams.
Next I put the fabric strips right sides together so that I could cut out both the front and the back hexagon pieces at the same time.

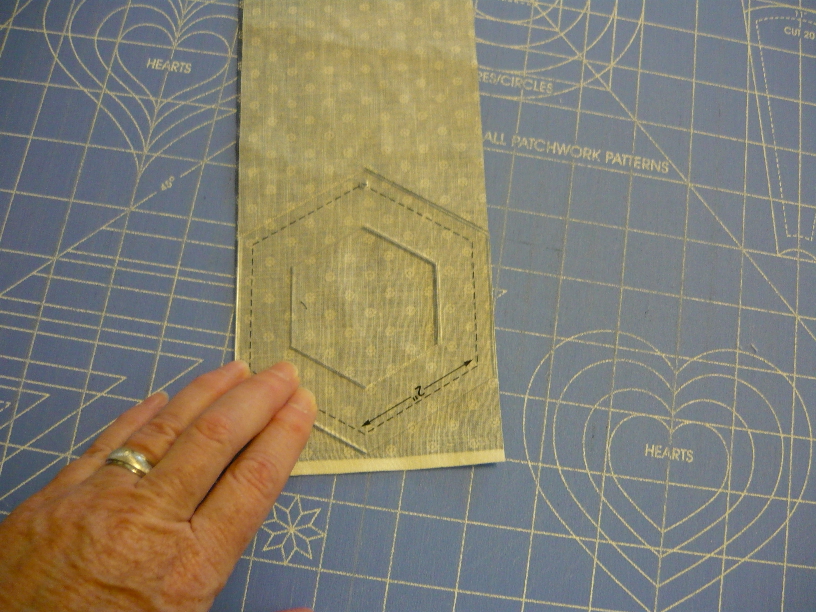
Then I placed the hexagon ruler on the strip, making sure the flat side edges of the ruler lined up with the edges of the fabric. Then using a rotary cutter I cut out the hexagons. I followed the same procedure to cut out the batting hexagons. Using this ruler and strip method creates a bit more waste of fabric than some other methods, but I found it to be more accurate and quicker this way.
When the above step is finished, you will have 2 fabric hexagons and 1 batting hexagon. As shown to the right.
Now layer the 3 pieces. Put the 2 fabric pieces with right sides together and place the batting piece on top.
Using the quarter inch foot on your sewing machine sew around 5 sides of the hexagon. You want to leave the sixth side open so that the hexagon can be turned right side out. Before turning, trim off the corners to about 1/8" from the stitching of the sandwiched piece. This helps to alleviate some of the bulk in the corners. Now turn the piece right side out.
After turning the hexagon right side out, you need to use a pointed object to push the corners out from the inside. I used a chopstick that I sanded to a point on one end. This works really well to get the corners nice and sharp.
Now you begin the hand sewing. Fold in a quarter inch of the front and the back of the open side and using small stitches, whip stitch the side together. Next work 2 lines of small running quilt stitches about a quarter inch from the outside edge and then another quarter inch inside that line of stitches, so that you have 2 rows of hexagons quilted in the individual petal. The picture on the right is my first hexagon, you can see that it is not perfectly hexagonal, but I have gotten better as I've made more petals. (Actually, I think the picture is slightly distorted. Look at the "straight" line below the petal.)

To assemble one complete flower block, sew a round of 6 individual hexagon petals to the center hexagon. Use small overcast stitches at the hexagons' edges. Turn the piece over and sew overcast stitches along the edges of the other side, too. Since this will be a 2 sided quilt, you want the stitching on both sides to be nice.
Attach the third round of 12 individual hexagon petals to this sewn piece, adding the hexagons one at a time. This completes 1 of the quilt's flower blocks.
I'm using unbleached muslin hexagons to join the completed flower blocks together by stitching 1 row of muslin hexagons between each flower block. My finished queen sized quilt will have about 39 flowers.


 To assemble one complete flower block, sew a round of 6 individual hexagon petals to the center hexagon. Use small overcast stitches at the hexagons' edges. Turn the piece over and sew overcast stitches along the edges of the other side, too. Since this will be a 2 sided quilt, you want the stitching on both sides to be nice.